ACDelco Gold 213-4514 Engine Coolant Temperature Sensor


€22.95
ACDelco Gold 213-4514 Engine Coolant Temperature Sensor Price comparison
ACDelco Gold 213-4514 Engine Coolant Temperature Sensor Price History
ACDelco Gold 213-4514 Engine Coolant Temperature Sensor Description
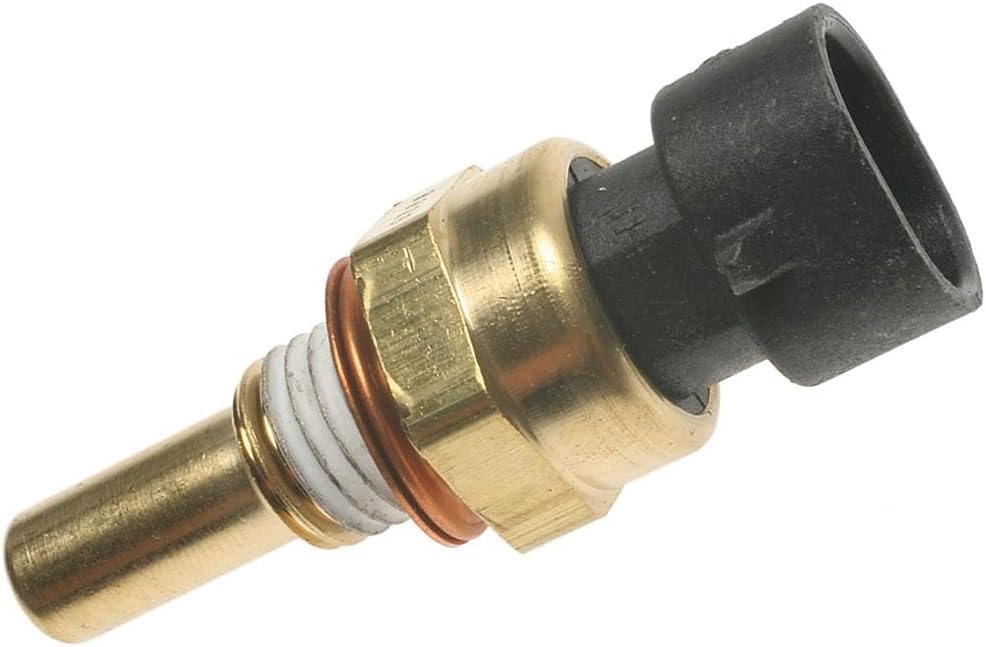
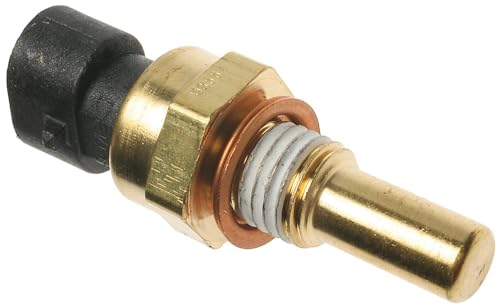
Introducing the ACDelco Gold 213-4514 Engine Coolant Temperature Sensor
The ACDelco Gold 213-4514 Engine Coolant Temperature Sensor is an essential component for maintaining optimal engine temperature. Designed for vehicle owners who prioritize reliability, this sensor plays a crucial role in monitoring your engine’s coolant temperature, ensuring your vehicle runs efficiently. With durable construction and impressive specifications, it stands out in the market, making it a popular choice among car enthusiasts.
Key Features & Benefits
- Premium Quality Construction: Made from stainless steel or corrosion-resistant alloy, the ACDelco Gold 213-4514 is designed to withstand extreme conditions, ensuring longevity and performance.
- Compact Size: Measuring just 3.6 x 2.2 x 1.7 inches and weighing only 0.634 ounces, this sensor is easy to install and fits most vehicle applications effortlessly.
- Advanced Temperature Monitoring: With an upper temperature rating of 250°F (2.5E+2 Degrees Fahrenheit), it provides accurate readings, making it perfect for high-performance engines.
- Flange Mount Design: This mounting style ensures secure placement, reducing the risk of dislodgment or damage during operation.
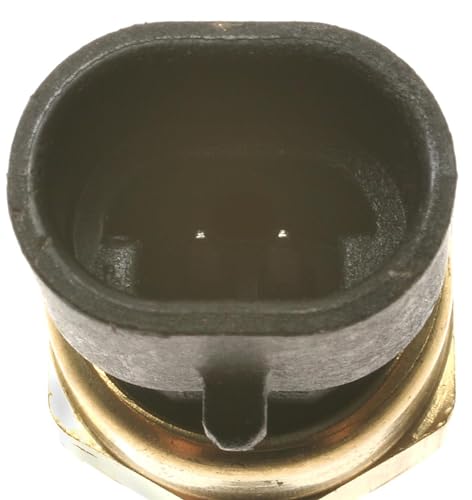
- Push-Pull Output Type: The sensor delivers reliable data transmission, enhancing the engine control module’s ability to maintain optimal temperature for peak performance.
- Trusted Brand – ACDelco: As a renowned manufacturer, ACDelco delivers quality products backed by years of expertise in automotive parts.
How Does the Price Compare Across Suppliers?
The ACDelco Gold 213-4514 Engine Coolant Temperature Sensor is competitively priced across various retailers. When comparing prices, you’ll find offerings from major suppliers often ranging from $25 to $40. Our price comparison tool enables you to quickly identify the best deal, helping you save money while assuring quality.
6-Month Price History Trends
The price history for the ACDelco Gold 213-4514 shows a stable trend over the past six months. Prices peaked around $38, with lower ends dropping to about $25 during promotional periods. Such fluctuations indicate seasonal sales and availability, allowing you to make an informed purchasing decision.
Customer Reviews Overview
Users have praised the ACDelco Gold 213-4514 for its exceptional performance and easy installation. Many customer reviews highlight the sensor’s consistent accuracy in monitoring engine temperature, contributing to better engine efficiency and longevity. A common positive remark includes its robust construction, enabling it to endure various environmental stresses.
However, some customers noted that installation may be challenging for those without mechanical expertise. A few reviews mentioned difficulty in accessing their vehicle’s engine compartment, which may not suit every DIY enthusiast. Despite this, the overwhelming consensus remains positive, emphasizing the product’s reliability and function.
Explore Unboxing and Review Videos
To dive deeper into the features of the ACDelco Gold 213-4514, consider checking out available unboxing and review videos on YouTube. These videos provide visual insights into the installation process and performance testimonials from fellow users, enhancing your understanding of the product’s capabilities.
Why Choose the ACDelco Gold 213-4514?
If you’re searching for a reliable engine coolant temperature sensor, the ACDelco Gold 213-4514 is an excellent investment. Its premium quality, competitive pricing, and proven performance make it stand out. Not only does it monitor engine temperature to help prevent overheating, but it also helps optimize fuel efficiency, ultimately saving you money in the long run.
This product is suitable for a wide range of vehicles, allowing for compatibility and versatility in your automotive needs. Whether you’re a seasoned mechanic or a first-time car owner, this sensor provides you the peace of mind that comes with knowing your vehicle is protected from overheating.
Compare Prices Now!
Don’t miss out on the opportunity to enhance your vehicle’s performance with the ACDelco Gold 213-4514 Engine Coolant Temperature Sensor. Leverage our price comparison tool today to find the best deals across multiple suppliers. Experience reliability, efficiency, and quality all in one perfect product!
ACDelco Gold 213-4514 Engine Coolant Temperature Sensor Specification
Specification: ACDelco Gold 213-4514 Engine Coolant Temperature Sensor
|
ACDelco Gold 213-4514 Engine Coolant Temperature Sensor Reviews (13)
13 reviews for ACDelco Gold 213-4514 Engine Coolant Temperature Sensor
Only logged in customers who have purchased this product may leave a review.
Related Products

Leslie M. –
Exact fit & got my Tahoe out of fans running high speed mode
Ellis Hunter –
OEM coolant temp sensor for cylinder head on driver’s side. Quick delivery and easy installation at affordable price
A Kirby –
Thankfully it was pretty easy install. No problems with the part.
james benton –
Reasonable price and match parts.
Quedo muy bien en mi yukon 2003 5.3 quedo exactamente –
Quedo muy bien en mi yukon 2003 5.3
Joel Hammer –
I think my first review was lost, so, here is my experience with a 2007 Saturn Ion. I followed the book. The stuff on U-tube wasn’t very helpful.
1. Remove splash guard.
What splash guard and why? First, I got out the jack and the mounting stand, and jacked up the left side of the car. This will involve unloading all the junk in the trunk. I thought I would be getting to the sensor from below. Not possible. I removed the long splash guard that runs under the entire radiator. Four push pins. Just pry out the central pin of each push pin with a screw driver and pull out the external piece. Trouble was, the two center push pins were installed “backward.” Had to push the pins out with a screwdriver, but the radiator above the guard didn’t have the clearance for the pin to clear the opening. This was a big pain. Remove the two end push pins first to get some play in the splash guard.
2. Removing the splash guard did nothing useful, as access to the drain plug for the radiator was not helped at all. Access to it is from the passenger side from outside the car. It opens behind the radiator. It is designed for finger use but there is no way to get a good grip on it. The right side wheel splash guard and the radiator rubber mount block access. Removing the mounting bracket was no help. Had to push it with a screw driver or something.
3. As the antifreeze comes out, it it will fall onto the radiator mounting bracket, making a very messy irregular stream. The book said attach a plastic hose to avoid splashing. Don’t see how that is possible. A small funnel with a plastic hose on it might do the trick. Wear safety goggles. When you open the cap on the expansion reservoir the stream will increase in volume and likely change course. Be prepared for a mess. Have a lot of water available to wash away and dilute the spilled antifreeze.
4. Remove the engine cowl. That is done by removing the oil fill cap, then pulling up on the cowl. There are two push connectors, one in back on the passenger side, the other in front.Try to keep dirt from falling into the oil filler opening.
5. The sensor is behind the engine, low, on the driver’s side. Access to it is only possible by standing in front of the engine, and using your left arm, reach behind the engine. I hope you have long arms. And, your arms aren’t too big around.
6. You have to raise the prong or pin on the plastic housing to slip it off. The clip points towards the engine, so you just raise it up and pull the housing off, with one hand. I tried to raise the pin up with a screw driver, to at least loosen it up. The orientation of the housing will be crucial. The pin might be facing to the left or right or up or down (where you can’t see it.)
Mind was facing away (to my right, with my arm coming from the left). After a lot of frustration I was on the verge of giving up when finally I managed to get the housing off with the fingers of my left hand.
7. I used a sparkplug socket to unscrew it (3/4’s inch). It was almost too big too fit in the available space, which is to the left and below the sensor as you turn it. A ratchet wrench is essential, since there is almost no room to work.
8. The sensor was not torqued very tight.
Installation is the reverse of the above. A mirror is very useful to see the hole which you put the connector into. With the teflon wrapping on the sensor threads, it screws in with mild resistance even when very “loose.” I tightened it until it got very difficult to turn, which happened in the space of 1/2 turn or so. When I was done, the connecting pin was completely hidden from view, as it was facing downwards. I wanted to have that pin facing to the left for easy removal next time. I pity the next guy who does this job on this car.
I refilled the antifreeze and all. The next day I got a low coolant error, since I had lost enough coolant from the irregular stream noted above.
Of interest, the check engine light still came on for a day after replacing the switch although the engine temperature gauge was working.
I spent upwards of four hours on this, believe it or not. Still not done, as I have to clean up the mess in the garage and put the spare tire and jack back into the care, since I was called away to work just as I got the job done.
But, hey, $10.00 is a steal.
So, what would I do differently next time?
1. Forget the jack and the splash guard stuff.
2. Have a small open ended 3/4’s inch wrench to turn the sensor to get the connecting pin on the harness pointing in a direction it is easy to get to.
3. Don’t bother draining the radiator. Put a big pan beneath the sensor to catch the antifreeze and work fast.
Doing the above would have made this 4 hour job into a 30 minute job.
================================
UPDATE Oct 30, 2015
A couple of days after fixing this problem the check engine light came on. The error code was P0118 this time, which indicates a short circuit or bad connection in the ECT circuit. The coolant temperature was reported correctly, so this is an “intermittent” problem. I reset the error code and several days later all is well.
=========UPDATE Nov 2, 2016=====
Still working. Still with rare,intermittent error codes.
=========UPDATE May 21th 2017===========
The symptoms were now the temp gauge reading zero, the check engine light on, and the radiator fan going constantly, similar to what I have experienced off and on for a year or more. . The error code was P0128, engine not reaching thermostat regulating temperature. This problem was erratic. Using a OBD reader, the temperature reported to the PCM was about 160-180 degrees, just below the thermostat open setting. Turns out with this code the PCM turns off the temp gauge and runs the fan constantly, I assume because the PCM isn’t trusting the ECT data. Replacing the thermostat fixed the problem.
I wonder if the original problem was related to the thermostat and not the ECT sensor? The thermostats routinely wear out. They should be replaced anytime your car seems to be colder in the winter than it used to be.
Chuckles –
Once I found the right socket (19mm extra deep socket).
To clear the connector, It needed to be about 1 1/2″ deep.
Wish I knew that, before I started.
I used a Lowes/Kobalt 19mm socket 1/2″ drive (part # 337731).
They sell the individual sockets in the drawer near the sets.
Good luck, hope this helps.
Kristina Gettemeier –
This fixed my problem. OEM is the way to go. Mine was throwing thermostat code. 2006 Yukon xl. Replace thermostat and came back on. So put the sensor and it is fine now
Stephane Lacerte –
Très bon !!!
Priscilla –
Speedy delivery, great product, and everything fit, and worked properly!
Alberto M. –
Sin problemas
Marc –
Genuine GM sensor in GM packaging. Arrived quickly and was a good price. Perfect fit for my Gen IV LS swap with X Max engine harness.
Tim Shaffstall –
Got here in great time