
€599.99
ANYCUBIC Kobra 3 Combo Multi Color 3D Printer Price comparison


ANYCUBIC Kobra 3 Combo Multi Color 3D Printer Price History
ANYCUBIC Kobra 3 Combo Multi Color 3D Printer Description
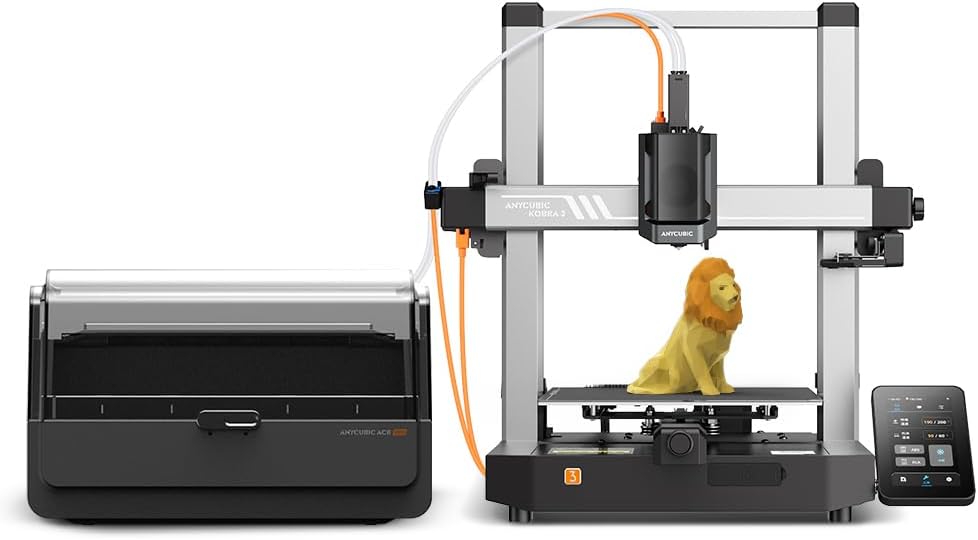
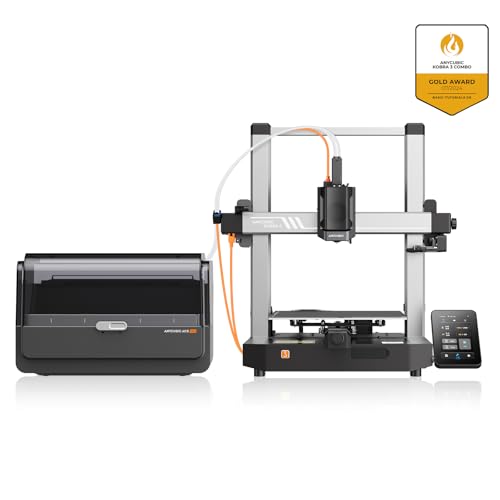
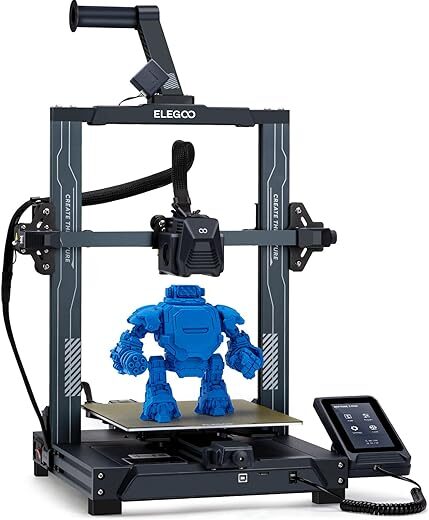
Introducing the ANYCUBIC Kobra 3 Combo Multi Color 3D Printer
The **ANYCUBIC Kobra 3 Combo Multi Color 3D Printer** is a cutting-edge machine designed for both hobbyists and professionals. With its multi-color printing capabilities and advanced features, this printer can transform your creative ideas into reality. Ideal for creating complex models, this 3D printer is a must-have for anyone interested in additive manufacturing. Let’s dive deeper into what makes this printer a standout choice for 3D printing enthusiasts.
Key Features and Benefits of the ANYCUBIC Kobra 3
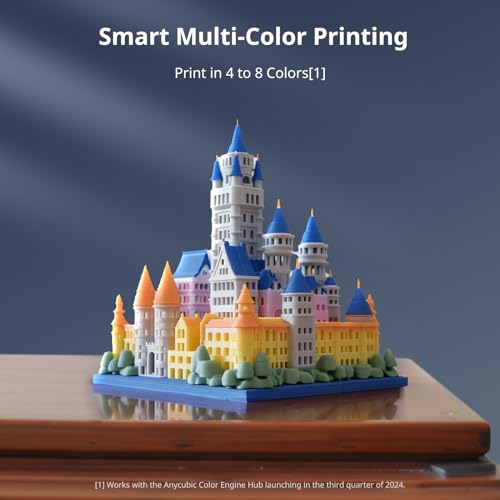
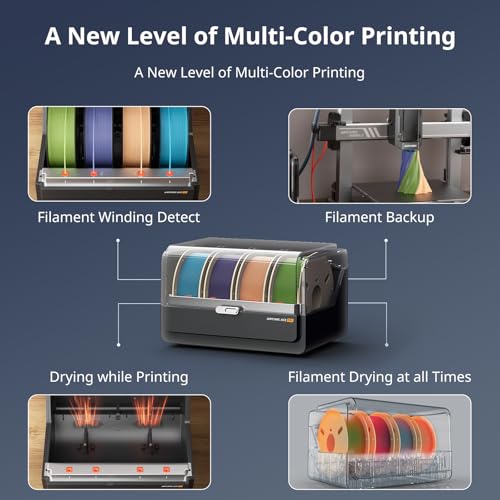
- Multi-Color Printing: The Kobra 3 enables seamless multi-color printing, allowing users to create vibrant and intricate designs with ease. This capability opens up a world of design possibilities.
- Large Build Volume: With dimensions of 17.8 x 19.8 x 19 inches, this printer offers ample space for large projects. You can print bigger models without any hassle.
- Diverse Material Compatibility: Compatible with various materials such as PETG, PLA, ABS, and TPU, this printer caters to different project requirements. You’ll have flexibility in material selection for diverse applications.
- User-Friendly Interface: Featuring an intuitive LCD touchscreen, navigating through settings and features is straightforward. Even beginners can operate this printer without extensive technical knowledge.
- Reliable Connectivity: Equipped with Wi-Fi and USB connectivity, the Kobra 3 allows effortless uploading and monitoring of print jobs from your devices.
- Eco-Friendly Design: Manufactured with sustainability in mind, this 3D printer minimizes waste and operates efficiently, making it a responsible choice for eco-conscious users.
Price Comparison Across Suppliers
When considering the **ANYCUBIC Kobra 3 Combo Multi Color 3D Printer**, it’s essential to check various suppliers for competitive pricing. Our price comparison tool reveals that prices can vary significantly across platforms, enabling you to find the best deal. Whether you’re shopping on major eCommerce platforms or smaller retailers, our insights can guide you to the optimal purchase point.
6-Month Price History Trends
Our price history tracking shows notable fluctuations in the Kobra 3’s pricing. Over the past six months, prices have dipped during promotional events, making this an excellent time for potential buyers. Observing the patterns can help you decide when to purchase for the best value.
Customer Reviews and Feedback
Customer feedback on the ANYCUBIC Kobra 3 is overwhelmingly positive, highlighting its performance and reliability. Users appreciate the excellent print quality, especially for intricate multi-color models. Reviewers note that the printer is consistent in its results, providing smooth and detailed finishes.
However, like any product, there are a few drawbacks. Some users have mentioned that initial assembly can be slightly challenging for beginners, but many find that following the manual resolves any issues. A small percentage of users experienced connectivity challenges, particularly in Wi-Fi settings, but these reports are minimal.
Explore Unboxing and Review Videos
For those who prefer a closer look at the **ANYCUBIC Kobra 3 Combo Multi Color 3D Printer**, consider checking out unboxing and review videos on platforms like YouTube. These videos offer firsthand perspectives on the printer’s setup, operation, and performance. Watching real users share their experiences can significantly aid in your purchasing decision.
Why Choose the ANYCUBIC Kobra 3?
The ANYCUBIC Kobra 3 Combo Multi Color 3D Printer stands out in the crowded market of 3D printers due to its impressive blend of features and user-friendly design. Whether you’re creating prototypes, artistic projects, or educational models, this printer excels in delivering high-quality results.
With its multi-color printing capability, diverse material compatibility, and reliable connectivity, the Kobra 3 is perfect for enthusiasts looking to elevate their 3D printing experiences. Moreover, the competitive pricing and insights provided on our platform ensure that you make an informed decision while shopping.
Get Started with 3D Printing Today!
Don’t miss out on the opportunity to own the **ANYCUBIC Kobra 3 Combo Multi Color 3D Printer**. Compare prices now and unlock your creative potential in 3D printing!
ANYCUBIC Kobra 3 Combo Multi Color 3D Printer Specification
Specification: ANYCUBIC Kobra 3 Combo Multi Color 3D Printer
|
ANYCUBIC Kobra 3 Combo Multi Color 3D Printer Reviews (7)
7 reviews for ANYCUBIC Kobra 3 Combo Multi Color 3D Printer
Only logged in customers who have purchased this product may leave a review.
Related Products


RetroGameBoyz –
The media could not be loaded.
First thing first make sure you switch the voltage switch on the back to the appropriate voltage for your region. It comes set to 230 V. Assuming it was set for my region everything does seem to work until you go to print and then the printer shuts down. Flipping the switch to 110 V fixes this issue. this is in the instruction manual but being in the United States and being sold in the United States I just assumed. So I received this printer and about 24 hours later —- after spending a few hours doing some research on YouTube and downloading printer profiles and testing out different slicer software I finally can say I am pleased with this unit especially for the cost. At first I wanted to throw my hands up and just forget about it because the first few prints failed – settings you might be used to on another printer especially for temperature are not the same. For example I print PLA using 210° to 215° with my Prusa – with the. Your I had to dial it back to about 185 because it was just coming out to runny – I am used to using a Prusa MK3s which is very user-friendly. The problems mostly I experienced is from the slicer software they tell you to use – Cura I don’t mean to be negative but the software is horrible and the G code it produces just does not wor well. I used the prisa slicer with a Anycubic Mega 3 profile (provided in the Prusa configuration wizard of the Prusa slicer) and made temp adjustments and as you can see in the video it is printing pretty well as I write this review I am waiting during the final minutes for it to finish and 8hr print. The provided SD card is garbage it fails when plugged into a computer and also failed mid print on another project I was working. The printer just stopped and when I went to the LCD panel where it would read the files the files were blank so do not use that SD card. The provided software Cura is not good at all you’ll need to download a third-party slicer if you want really good prints. Auto leveling worked fine a bit slow. I also suggest you create a few test prints about a half millimeter to 1 mm thick so you get an understanding of how good the adhesion is and so you can adjust your Z offset appropriately to get the perfect first layer. I will come back and update this review as I continually use this.
Antauri –
La verdad me ha encantado, puedes realizar todo tipo de proyectos, hasta ahora no he tenido problemas para imprimir cosas
Ivan G –
Me gusto mucho su calidad y aunque es nueva venia con una conexión rota que no afecta en su funcionamiento.
Paul A. Kohn –
I received the Vyper 3d Printer within 2 days after I purchased it! Beforehand, I did a bit of reading and comparing. There are some real benefits to buying the Anycubic Vyper 3d (not to be confused with reviews on the Anycubic Kobra which is not as automated). The first print I tried worked out great and the owl (included on the SD card) looked pretty awesome! The total setup time was about an hour or so. There were a few things I had to redo on the setup but they were mostly my fault for not reading the guide better. There are only about a dozen (easy) steps total to the entire setup. I fully agree with the reviews I read about this being one of the best and easiest to use 3d printers. Once I was done, it all made sense.
Here are a few tips to help with your setup:
1. You may want to order 1 or 2 (standard PLA) filaments with the 3d printer. Included is a small roll of filament that isn’t on a spool. Trust me, you’ll appreciate this when you get ready to do your first 3d print. I purchased a gold PLA standard filament which looks pretty nice once the object is printed.
2. There are a few tools included but personally I would get a better putty knife and a larger hand-sized zip tie cutter. You’ll only use the zip tie cutters once but you’ll use the putty knife after each print. The plastic putty knife included is nice but not ideal. I use a cheese cutting knife where I can use the big ball end to knock off the 3d object to break it loose from the magnetic top and the sharper blade end to get the residue off (being careful not to cut the magnetic top). The zip tie cutter is really (really) small and not ideal for some of the tougher zip ties you’ll need to cut. There are about a 1/2 dozen or so zip ties to cut which are in obvious places. Don’t forget about the large zip tie that is directly under the bed and securing it. It’s almost impossible to cut this bigger zip tie with the small zip tie cutter included. I am grateful the Vyper shipped with tools even though I couldn’t really use a couple of them (I guess I could use them in a pinch if I had nothing else.) I really like the slide out box for tools.
3. Unpacking is straight-forward and the quick setup instruction guide is good to look at (carefully). I did have to re-read a few sections and diagrams. The steps are easy and straight-forward as long as you actually read the guide. Again, there are only about a dozen steps in the whole setup!!
Some of the arrows on the diagrams could be a little clearer on where the bolts need to screw in but it’s difficult to mess this up when you only have 4 bolts (total) to worry about securing (nice)! They also include an L shaped hex type tool (whatever they are called.) You only need 2 of the 6 L shaped hex tools to tighten the 4 screws. I thought I was missing these tools until I opened the drawer in the front of the printer (below the LCD display on the right side). I found these tools secured in the drawer. Everything was neatly packaged and very secure to prevent any damage.
4. After mounting the LCD, I couldn’t find the cable to connect to it until I pulled out the 2 big styro-foam blocks directly under the bed which were put there to keep the bed from moving while being shipped (you have to pull these out to clip the center zip tie under the bed.). Pull these out slowly as there are a few other cables taped under the styro-foam blocks. Besides the 4 cables to connect to the side motors, you will also see the LCD cable. It’s difficult to mix up the connections since each one is a different size. There are about a 1/2 dozen cables total to connect (excluding the LCD cable). I was able to connect all the cables even though I had to re-route a few of them. Pay attention to the quick-startup guide and avoid routing them the same way as the diagram with the big red X. If you need to unplug them, you can slowly wiggle them out or there are 2 plastic things on the side of a couple of the connectors to push out which lets the cable unplug.
6. I powered everything up and inserted the filament into the guide. I then followed the instructions to push the “Filament In” button to get it to auto-route into the white tubing down to the tip. It was a little tricky but everything made sense following the guide and reviewing a few youtube videos to make sure.
7. The auto-leveling was painless and went without problems again, following the straight-forward guide.
8. Touching the tip of the heating end took a few touches with a metal object (anything metal I guess). I had to touch it a 3-4 times until I saw the LCD screen starting to execute the next step.
9. One important note is that you’ll need a slicing program. Cura comes on the SD card but you may want to download and install it ahead of time from the web to make sure you have the latest version. Thingiverse is an awesome website to search for *.stl files to print. You open the *.stl file with Cura and then click the blue “Slice” button (bottom right) to make it into a *.gcode file. The *.gcode file then needs to be copied to the (root) of the sd card. The owl.gcode example file on the sd card needs to be copied from its folder to the root of the sd card before you can see it listed on the LCD screen. When you click to print the files on the LCD screen, you will then see all the *.gcode filenames in the root (ie. not in any folders) on the sd card. It’s not a big deal but hopefully future versions of the LCD will allow you to navigate to sub-folders. My only complaint is that I had to copy the owl.gcode file to the root folder so the LCD would then see it. I then selected it and pushed the “Print” button to start printing.
10. Here’s another important tip that I had to research on the web. The Vyper ships with the voltage defaulted to 115 (typo on the dial, it’s really 110 and 220). After I clicked the Print button to print the owl, the screen turned black (and I panicked!) I waited, waited and waited. I then did some googling and I quickly found that this is caused by the incorrect voltage setting on the Vyper and you need to simply flip the red switch in the back of the unit until it says 225 (220) if you live in the U.S.A. or use 220, otherwise leave it. Once I did this and went to print, everything started immediately. The LCD unit will let you auto-level and do other steps but once you try to print, the screen will go black if the voltage setting isn’t set correctly. Just turn off the machine and change the voltage setting to fix this.
11. The owl turned out perfect on the first try!! It was simply awesome to watch (it took about 1 1/2 hours.)
12. I downloaded more *.stl files (zipped) from Thingiverse (Yeggi and other sites also have *.stl files at a small cost of about $1-$2 each). I’ve been converting these to *.gcode files on the computer, copying them to the root on the sd card and then printing them. I had one small problem where I sliced an *.stl file of an object which didn’t have a proper base (one side of it stuck out 4 inches at a 45 degree angle and there was nothing under to support it.) This caused the printer to try and print into thin air which then caused the filament to speghetti out. I paused and then eventually stopped the printer realizing that it just wasn’t going to print properly without some kind of support on the one end (the object wasn’t designed correctly).
Another nice feature I noticed is that I can start the print and walk away. The head is designed to shave off the excess filament goob onto the side of the magnetic coating before it starts the actual print in the center. I just brush this goob of filament off the top of the coating when I check on things.
I hope these tips help. One last thing to mention is the magnetic board will slide into place (after the printhead has heated up and shows 200/200 for the OE. You don’t need to pre-position or worry about the board sliding forward. After the pointhead heats up for the next print, the magnetic board will slide back into place.
Make sure to have fun with it. I’ve only had mine for 2 days and I’m having a blast printing out objects. There are soo many cool and useful gadgets you can print. Many kitchen and other useful gadgets that would cost me $20 or more can now be created for less than a few dollars of filament!
MarcelD –
Mit ein wenig ausprobieren der Einstellungen beim slicen lässt sich bei dem Drucker eine sehr gute Druckqualität erzielen. Auch das mitgelieferte PLA ist recht hochwertig. PLA, PETG funktionieren ohne Probleme. ABS löst sich und verzieht sich nach oben, was aber ohne eine beheizte Druckkammer zu erwarten war.
Es gibt jedoch hier bei Amazon noch ein paar kleinere empfohlene Zubehörteile welche das Druckbild nochmals verbessern. Ebenfalls sind im Internet noch ein paar 3D-Objekte zu finden welche hierbei helfen können.
Bemalen lässt sich das PLA ganz einfach z.B. mit Revell Aqua-Color.
Leider hatte ich Probleme mit den Lüftern (Lagerschäden) nach nur 2 Monaten. Diese wurden jedoch vom freundlichen Support schnell und einfach zugeschickt somit konnte ich diese selbst austauschen.
Kann dieses Gerät und auch den sehr freundlichen, wenn auch nur englisch bzw. chinesisch sprechenden (Sitz in Shenzhen), Support nur empfehlen. Bei Fehlern und Problemen sehr schnell und hilfsbereit.
MarcelD –
The media could not be loaded.
Solo tengo 2 semanas con esta impresora y ya no funciona 👎🏽.
Al principio funcionaba muy bien imprimí la impresión de prueba del búho y otra pieza que yo necesitaba y salieron perfectas y desde hace 3 días estoy tratando de imprimir y no deja de marcarme este error, y por tanto no imprime nada. Ya revisé todo el cableado y todo está en orden. ¿Como ahí que?
TheReader –
Ich habe mit zwei Anycubic I3 Mega gekauft aus zwei Gründen: sie waren mit Rabattaktion sehr günstig bei dennoch “massivem” Aufbau und man kann diese Teile wirklich an sehr vielen Stellen umbauen, erweitern etc. Diese Umbaumaßnahmen habe ich mittlerweile auch bei beiden Modellen vorgenommen. Gerade, weil ich hier auch tiefer in die mechanische Thematik reinkommen wollte. Aus der Box heraus sind diese Drucker unglaublich laut. Die StepperMotoren und die Achsenbewegungen in Zusammenspiel mit den extrem lauten Lüftern (im Netzteil und am Druckkopf) stellen sicher, dass auch die Nachbarn anfragen, ob man sich jetzt eine “Industriemaschine” zugelegt hat, so laut sind sie. Nach dem Austausch des Netzteil-Lüfters, dem Tausch der Treiberbausteine und Verwendung von sehr leisen Noctua-Lüftern, nach komplettem Umbau des Druckkopfs mit Gehäuse für zwei weitere 40mm Noctua-Lüfter (alle Teile gibt es zum Selbstdrucken auf Thingverse) und dem Tausch der Lager durch Ruthen Kunststoff-Gleitlager (statisch mit Loslager) sind die Drucker nun flüsterleise. Man hört nur noch ein sehr angenehmes und sehr leises Rauschen, wenn die Noctua-Lüfter arbeiten. Ich bin von rund 65 dBA auf nunmehr 36 dBA runtergekommen. Man sieht dass sie drucken, aber aus 2m Entfernung hört man nix mehr!!! GENIAL! Und das ist das Gute an diesen Anycubics: man kann viel selber schrauben und verbessern und wird mit Erfolg belohnt.
Die Druckergebisse sind mit meinen Filamenten und den jeweils dazu passenden (optimierten) Slicer-Profilen richtig gut. Also wirklich richtig gut, kein stringing, kein ghosting, kein warping, keine Nasen, ab und zu mal hier und da ein Krümel oder mal kleine Stalagmiten, aber sonst durch die Bank weg sehr sehr glatte Oberflächen (nutze BuildTak-Oberfläche auf der Ultrabase) bei 0.1 bis 0.15 mm Layer Height. Ich muss meine Objekte kaum noch nachbearbeiten, sofern die Supports richtig gesetzt sind 😉 PLA und PETG kann ich auf beiden Anycubic hervorragend nutzen (PETG hat aber doch etwas mehr stringing).
Mit den Moddings (von Thingiverse) für Display-Rahmen, große Rändelschauben fürs Bed-Leveling und einen Spulenhalter sowie einem Ablagebehälter für Werkzeug, sind meine Anycubic optisch richtig geil geworden und bilden damit für den Dauereinsatz mehr als geeignete “Druckmaschinen” für Teile bis 20cm Baugröße. Habe bereits viele kg Filament verdruckt und die Anycubic laufen und laufen … einschalten, vorwärmen, los gehts. Ich liebe es!
Alles in allem sind die Anycubic wegen großer Community, der vielfältigen Umbaufähigkeiten und der günstigen Preise auch für das Zubehör insgesamt echte Allrounder, die bei guter Behandlung erstaunlich gute Druckqualität über Wochen liefern können. Der massive Aufbau und die vergleichsweise moderate Stellfläche sind weitere Punkte. Ich bin mit meinen Anycubic MEGA zufrieden und würde mir jederzeit wieder Drucker von Anycubic kaufen (Mega X oder mal der Chiron…). Stehen meinem Artillerie Genius und dem Pruza MKS3 V3 in nichts nach …